|
|
|
|||||||||||||||||||||||||||||||||||||||||||||||||||||||||||||||||||||||||||||||||||||
|
|
||||||||||||||||||||||||||||||||||||||||||||||||||||||||||||||
Prelude Location.
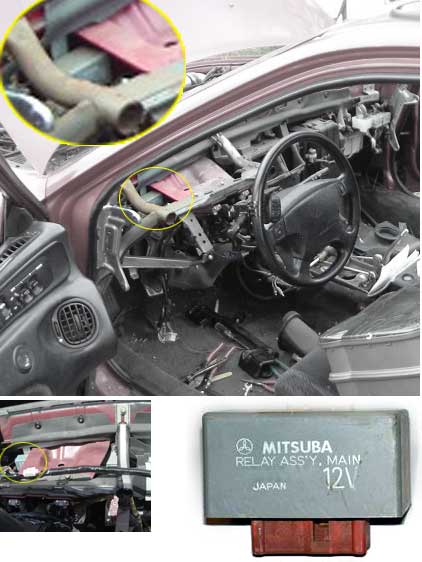
This 4th gen (1992) image below photograph by a wonderful individual from preludezone.com's DYI removing dash shows the exact location. You can simply remove the guts or the harness. See help here.
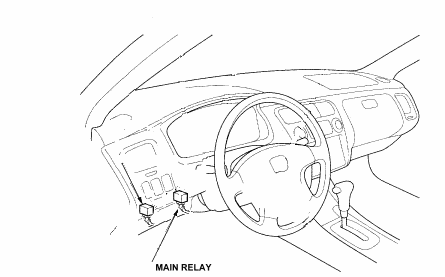
Instructions for 88-91: Note: The prelude location is contributed by a member
and unconfirmed. If you still can't find it see the FAQ "I can't find my main relay, where is it at?"
- Remove the coin tray covering the fuse panel.
- Remove the 5 screws holding the lower steering cover under the steering column.
- Unplug the 3 electrical connectors attached to the lower steering cover.
- Using the 10mm socket and the ratchet with extension, remove the 2 bolts holding the fuse panel.
- Work the fuse panel out from under the dash and disconnect some of the shorter harness connectors to get the fuse panel out.
- Unplug the wire harness connector from the main relay.
- Use the small flat head screw driver to depress the tab that locks the main relay onto the fuse panel.
- Slide the relay off
- Installation is the reverse of the procedure, although it isn't require to bolt it back at its original spot. Move the relay to a low, suitable spot where it is cool and away from a heat area.
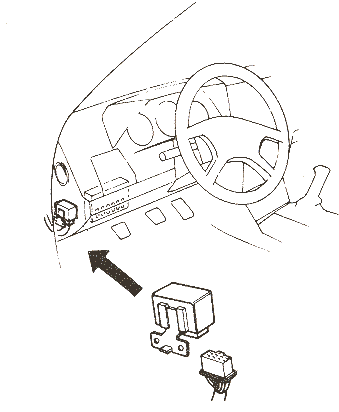
CRX
88, 89, and 91 relay location/replacement procedures:
 |
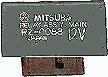
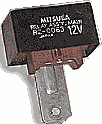
A main relay
should look like this
|
| or this.
|
|
The main relay is located just right above the hood release, inside the dash panel bolted to the left kick panel with a bolt that will fit a 10 mm box wrench. It has seven wires from the connector.
- Remove the coin box (for a better view.)
- With a 10 mm box wrench, reach deep inside and at the top of the relay there you will feel a bolt.
- Unbolt it. (If you cannot unbolt then you may dislodge the relay from the the steel tab using a large flat head screw driver.)
- If you damage the tab, you may be able to flatten the tab back to shape.
- Bring the relay down and unplug the connector by squeezing the locking tab then separate the connector from the relay.
- Installation is the reverse of the procedure and installed at a lower reachable location.