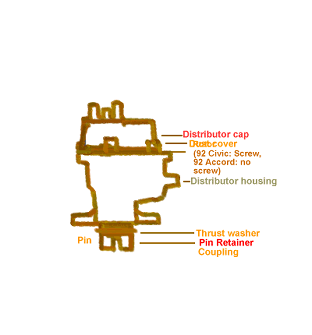
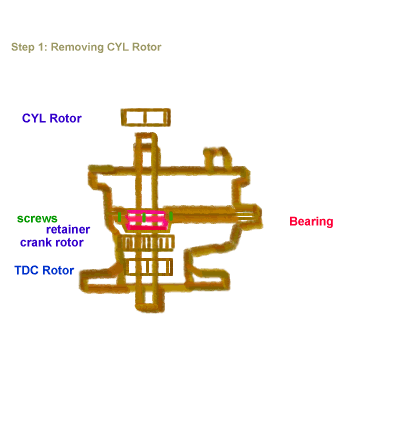
Removing
Covers
The covers
and various parts from the distributor housings are
shown.
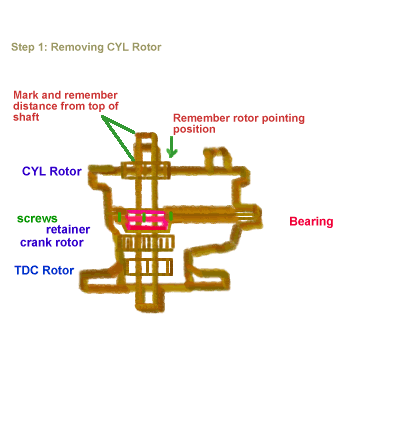
CAUTION: Do not tap on the rotor to remove it, instead use
large flat head screw drivers. Tapping increases the
chance of damaging the coil. Do not work with the
ignition system with ignition ON.
Sorry for the missing images.
They were accidentally deleted and can't be recovered.
This pages and others here are for reference only.
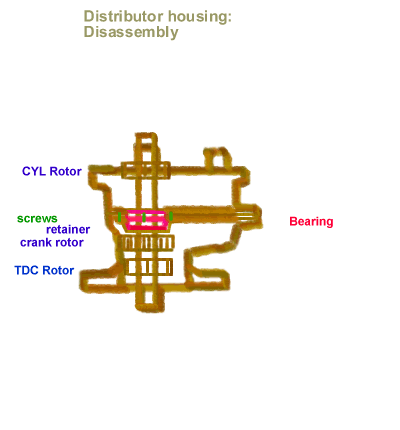
Find a suitable wooden and hard surface working bench for various exercises. Always protect ears from sharp sound when using a hammer.

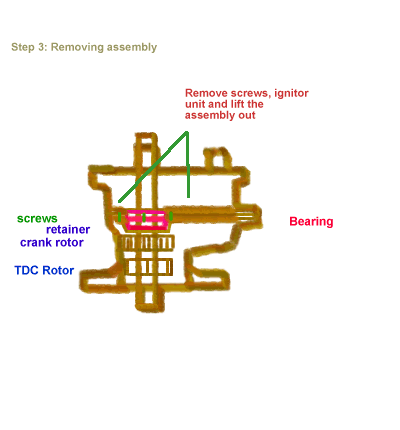
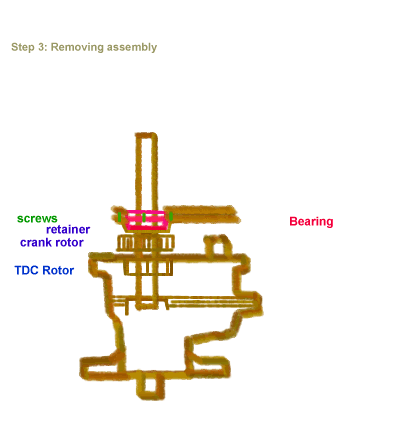
Remove the ignitor and coil first. Do not remove the sensors. Aligning the sensors may be extra work you don't need.
No image.

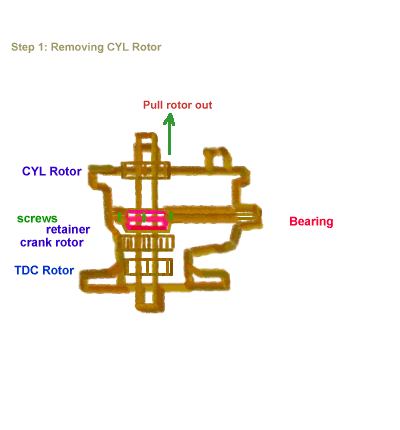
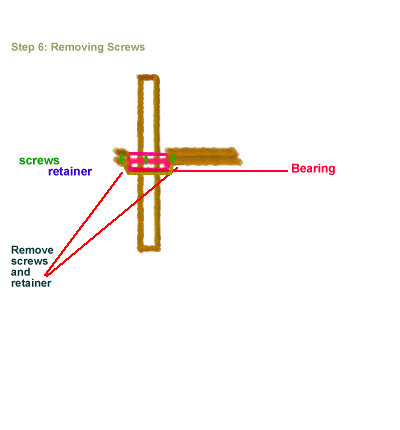
If you find that it is difficult to pull the CCYL Rotor out from the shaft, you can do this part after step 6, after the removal of the bearing retainer screw. At this point a hammer can drive the shaft out.
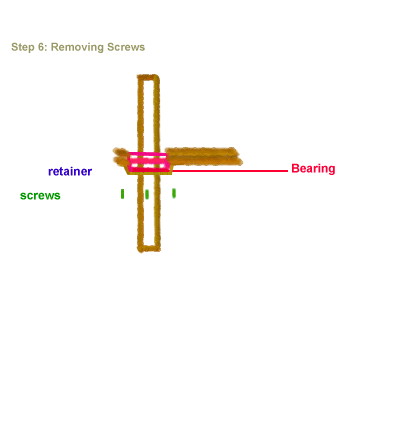
The screws are extremely tight. Ensure that you use a high quality phillips tip that fits in snug. Any slippage would slow down your work.

Note the distance apart from the tip of the shaft and the rotor. Use a millimeter ruler to ensure a correct alignment with the sensor during reassembly.
You may Skip this and go to other Procedures an alternative
No image.

No image.

No image.

Putting the rotor on a foundation
The rotor is placed against two flat piece of iron metal resting on two block of bricks (not shown.)
At this point, you can place the iron metal between the bearing and the crank rotor and hammer the other end of the shaft found in Procedure 2 Alternative
No image.

No image.

No image.

No image.


No image.

No image.

No image.
To ensure a proper repair, purchase a new bearing and seal retainer, all available at the location below. If the new bearing is equipped with a built in rubber or plastic seal retainer then a seal retainer is not required.
The bearing can be repaired if a bearing is not available and the bearing had been producing a screeching sound rather than a course sound. Just press in grease, seal it tight and finish it with a seal retainer (separately for $5.95, + $2 SH, Torrance, CA) Please check back for dealer's full address.
Ref: rec.autos.makers.honda