Home > VSS > Removedash

How to remove the Honda Accord dashboard.

Steps

  1. Remove the dimmer controller, the cruise control button, the coin box tray, the stereo, the steering column upper cover and all the screws shown below.

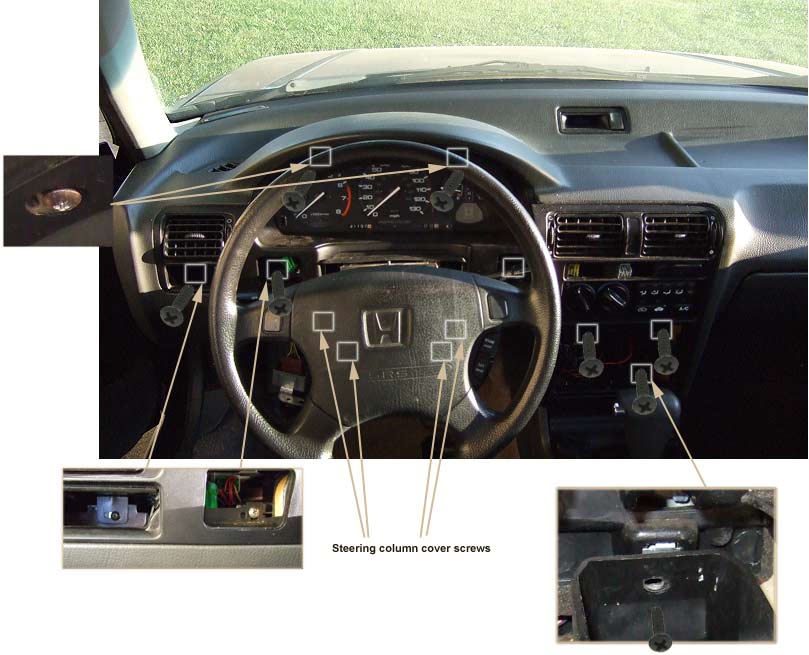
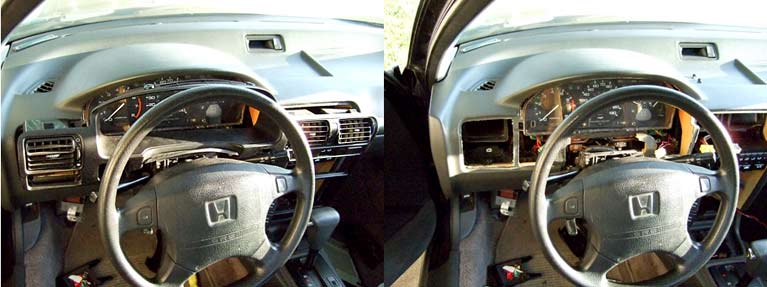
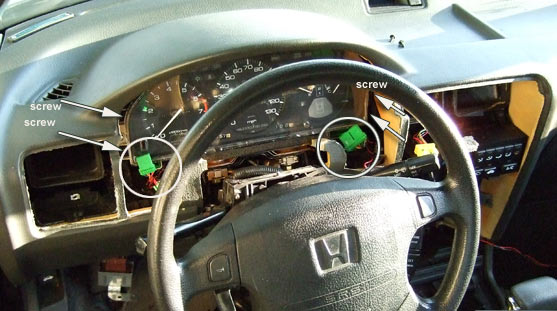
    Tips: Remove the coin box by pulling it out by hand. Remove the cruise control buttons by prying with a small flat head. Then squeeze the connectors to release the electrical connector. Only the upper steering column cover needs to be remove, leave three screws on the lower cover. The stock stereo is held by several bolts. They are accessible only after removing the bottom tray below the stereo.

    Each square box is a screw behind it. 12 screws have to be remove.


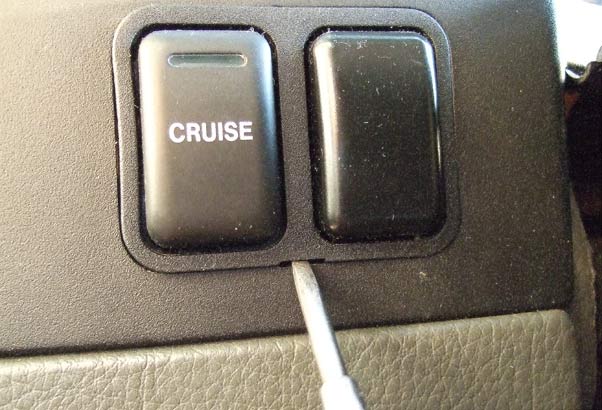
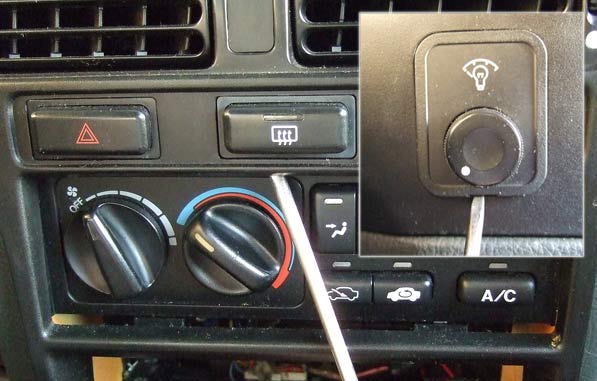
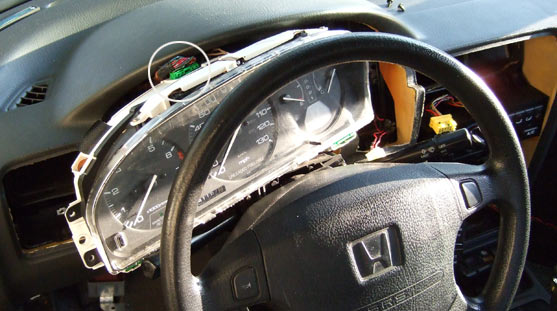
    Prying with a small flat head with a cloth wrapped to prevent marring.


  2. (Below.) Release the two last buttons with your fingers or a screw driver.


  3. Gently, pull out the dash cover as a unit taking care not to let cover break.


  4. Remove the four screws and release the two connectors by pressing the lock inward with your thumb and pull the connector out.  Pull the instrument gauge side to side and outward towards the left and outward. 


  5. Release the last connector.


  6. If the symptom is when the RPM or the speedometer works okay only for a short time after a key is inserted into the maintenance keyhole [see image] then a calibration may be needed.


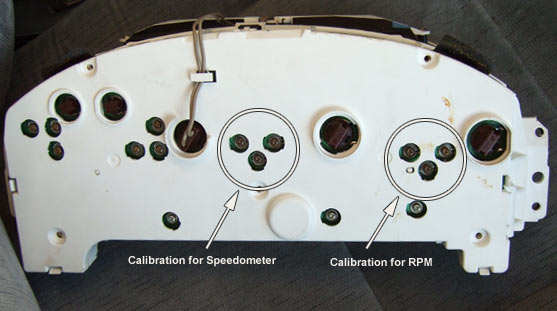
    The calibration is done by twisting the screw until it is tight. Then slowly release the screws (counterclockwise) until there are little or no pressure. Then twist the screws clockwise again using a lot of care to make sure that each pressure on each screw is balance and has the same identical pressure as the screw before it. A test drive will confirm that it is calibrated correctly.


  7. Installation is the reverse of the procedure, taking care not to break the steering dash cover.

  8. If the problem persist attach an external speedometer, rpm meter or a measuring instrument that can measure a voltage pulse on the back of the connector. Attach it to the usual orange wire for speedometer or blue for rpm. Run the engine or the car to determine if the signals are reaching the instrument gauge consistently. 

    Signals for speedometer is pulsing positive.
    Signal for rpm is pulsing ground.

    If they are fine then determine if the gauge is faulty by putting a working gauge in it's place. Most often if both speed and rpm gauge fail at the same time, the power supply or calibration may be the problem.


(c) Techauto